To be honest, I couldn’t think of anything which begins with a Q which I have made. However, there are lots of awesome “Q” foods which I have had in various parts of the world and which someday I would like to try my hand at.
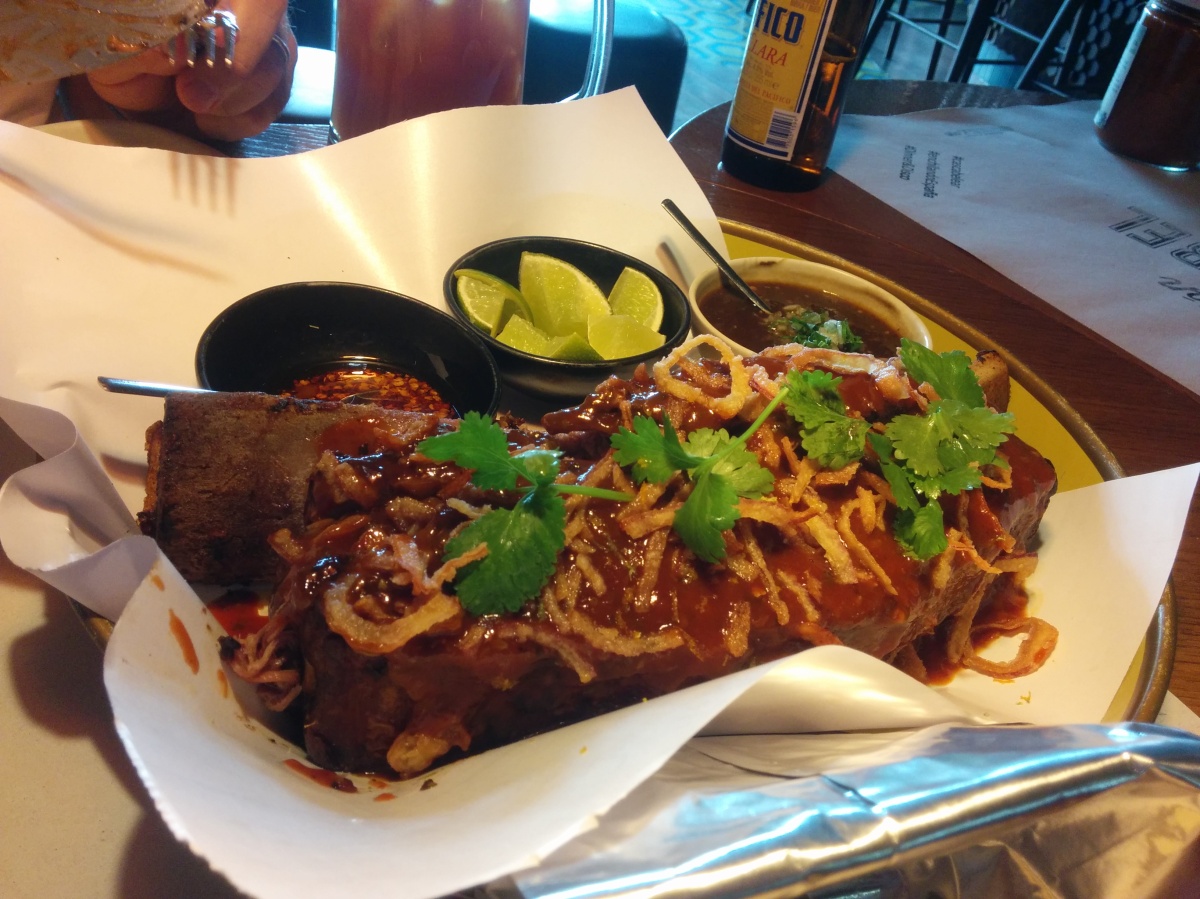
Q for Quesadilla. Quesadilla is a Mexican dish which comprises of a warm roti like flatbread stuffed with mainly cheese and/or meat and vegetables. This is generally pan grilled. I have never been to Mexico, the closest connection I can claim is watching Narcos Mexico on Netflix. Just joking! I have tasted Mexican food in Texas in USA which borders Mexico and has therefore adapted a lot of their food cultures. Authentic Mexican cuisine is widely available in Texas – from tacos and nachos to enchiladas and quesadillas. Taco trucks are one of the favorite food haunts of locals I have heard.
I had quesadillas in San Antonio on a famous restaurant on the Riverwalk. Unfortunately, I do not remember the name. Also, tacos and enchiladas in Gloria’s Latin Cuisinein Austin. Both were so delicious melt in the mouth quesadillas that I have been a fan ever since. This was my second brush with Mexican cuisine. My first brush was – surprisingly! – in Madrid, Spain. I had nachos with guacamole, ceviche de vieiras (scallop ceviche) and Machete (ox rib). Cascabel restaurant – mind-blowing!
Recipes:
Since I have never made this one at home, I am recommending some recipe links which I have checked out and feel are authentic but easy to make.
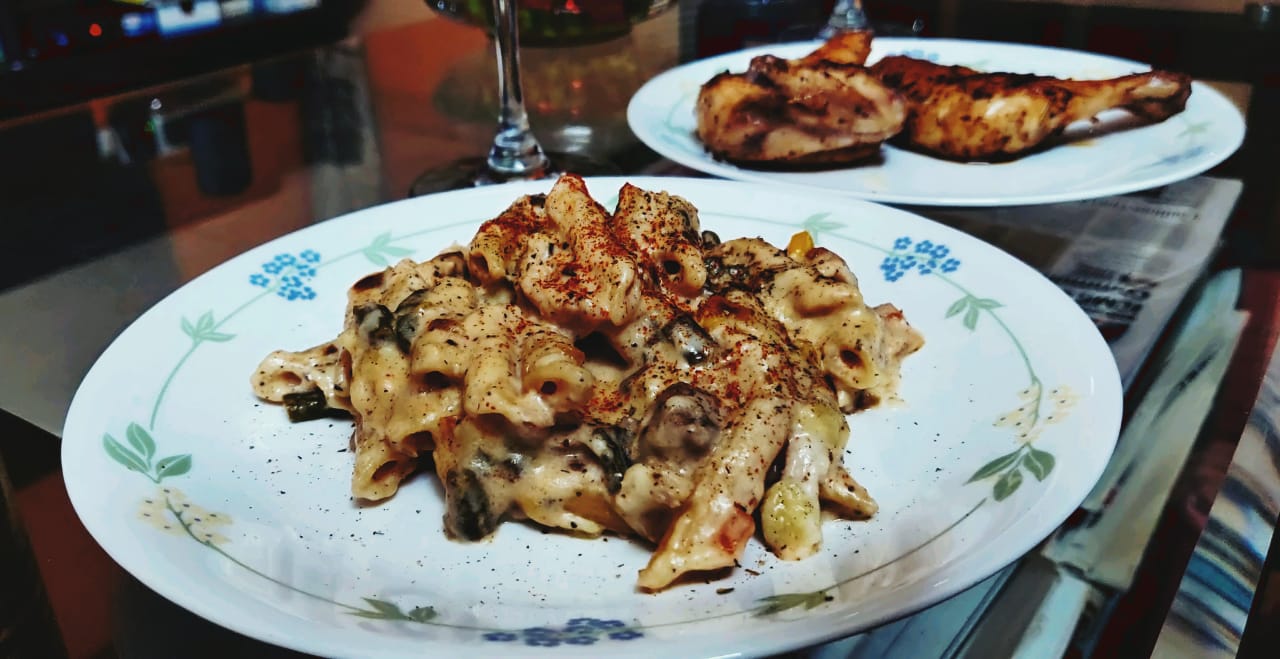
Who doesn’t love pasta? We needn’t always go out to a fine dining restaurant (or order in nowadays) because here I come with a delicious but easy cook version. This recipe is one of those simply made dishes which can be whipped up on a weekday and voila delicious meal ready!
Amo Il Cibo Italiano
Continuing my love for Italian cuisine, here’s a dish which is, I think, quite close to the original version and not an indigenous version of the same. It’s not at all complicated – of course, I am not making the actual pasta from scratch – and can be done in about 30 minutes.
Ingredients:
Pasta – penne, 125gms.
Sweet corn – ½ cup
French Beans – 100 gms., chopped
Garlic – 4/5 cloves, chopped
Onion – 1, medium, chopped
Capsicum – ½, medium, chopped
Flour – 1 tbsp.
Milk – 3 cups
Salt – to taste
Pepper – 1 tsp.
Red chilli powder – 1 tsp.
Oregano powder – 2 tsp.
Thyme powder – 1 tsp.
Cheese – 1 cup, grated
Butter – as required
Oil – 2 tsp.
Method:
Boil the pasta in a pan of water with a pinch of salt. Pasta should be al dente. Drain them in a colander once done. and drizzle some olive oil over them to keep from sticking together.
Boil the chopped sweet corn and french beans (and any other veggies you may want to add like carrot, broccoli, mushroom etc.) with a pinch of salt in a saucepan till they are about ¾ cooked. Drain them once done.
Now, onto the main part of the dish (in my opinion) – the white sauce!
Heat 2 tsp. oil in a frying pan. Add chopped garlic and sauté till you get the nice fried garlic smell.
Add the chopped onions and capsicum till they are translucent.
Then add a knob of butter (~1tbsp.). Once the butter melts, add the flour and keep mixing so that it doesn’t form lumps.
Now add in the milk and keep sauteing to avoid lumps.
Once the sauce starts to thicken, add in salt, pepper and red chilli powder, thyme and oregano and mix.
Add ¾ cup cheese and mix.
Add the boiled veggies and the pasta and mix well.
Garnish with red chilli flakes, oregano and remaining cheese.
Serve hot with some chilled wine.
This is a dish I make often which takes the boring out of any normal day. Alfredo pasta, some wine, some Netflix and ahh, a fantasy meal!
This post was written for Blogchatter A2Z challenge; Day 16 – Letter “P”.
This one is a throwback to childhood favorites; when all you had to worry about whether you were getting a bigger piece than your sisters. Ah, that was life.
Mom’s Recipe totally
It’s straight from Mom’s huge repertoire of awesome dishes. This soft, fluffy cake is unlike any shop made cake and is just mouthwateringly delicious. It’s best had fresh from the oven – hot and oozing that intoxicating baking smell.
Ingredients:
Flour – 1.5 cups (~200gms.)
Baking powder – 1.5 tsp.
Butter – 75gms. (at room temp.)
Sugar – 1.5 cups (~180gms.)
Eggs – 4
Orange – 1
Milk – ¼ cup
Method:
Sieve the flour and baking powder atleast 3 times. This helps to create a homogenous mixture and to avoid lumps.
Juice the orange and keep aside.
Chop ½ of the orange skin into tiny cubes and soak in the milk for 15 minutes.
In a mixer, mix the sugar and butter together until they are properly blended.
Add the eggs and blend thoroughly. Pour the mixture into a mixing bowl.
Next, add the dry ingredients’ mix 3-4 tbps. at a time and mix by hand until you get a nice smooth batter.
Add the orange juice and the soaked orange zest.
Preheat the oven at 180°C for 10 minutes.
Meanwhile, grease your baking tray with oil or butter, pour the batter into it. The tray should be filled upto ¾ height only to allow space for rising.
Bake for 20-25 minutes until a tester (usually a fork) comes out clean.
Tip: Always be sure to mix in the same direction be it clockwise or anticlockwise. The whole mixing can be done in a mixer or a food processor, but I find mixing by hand is the best at least partially as indicated above.
The orange juice adds a zing to your normal everyday sponge cake and the bits of orange zest gives it additional flavour when you bite into your cake.
Mom hasn’t made this cake in a long while, so I’m resorted to using Internet sourced images.
This post was written for Blogchatter A2Z challenge; Day 15 – Letter “O”.
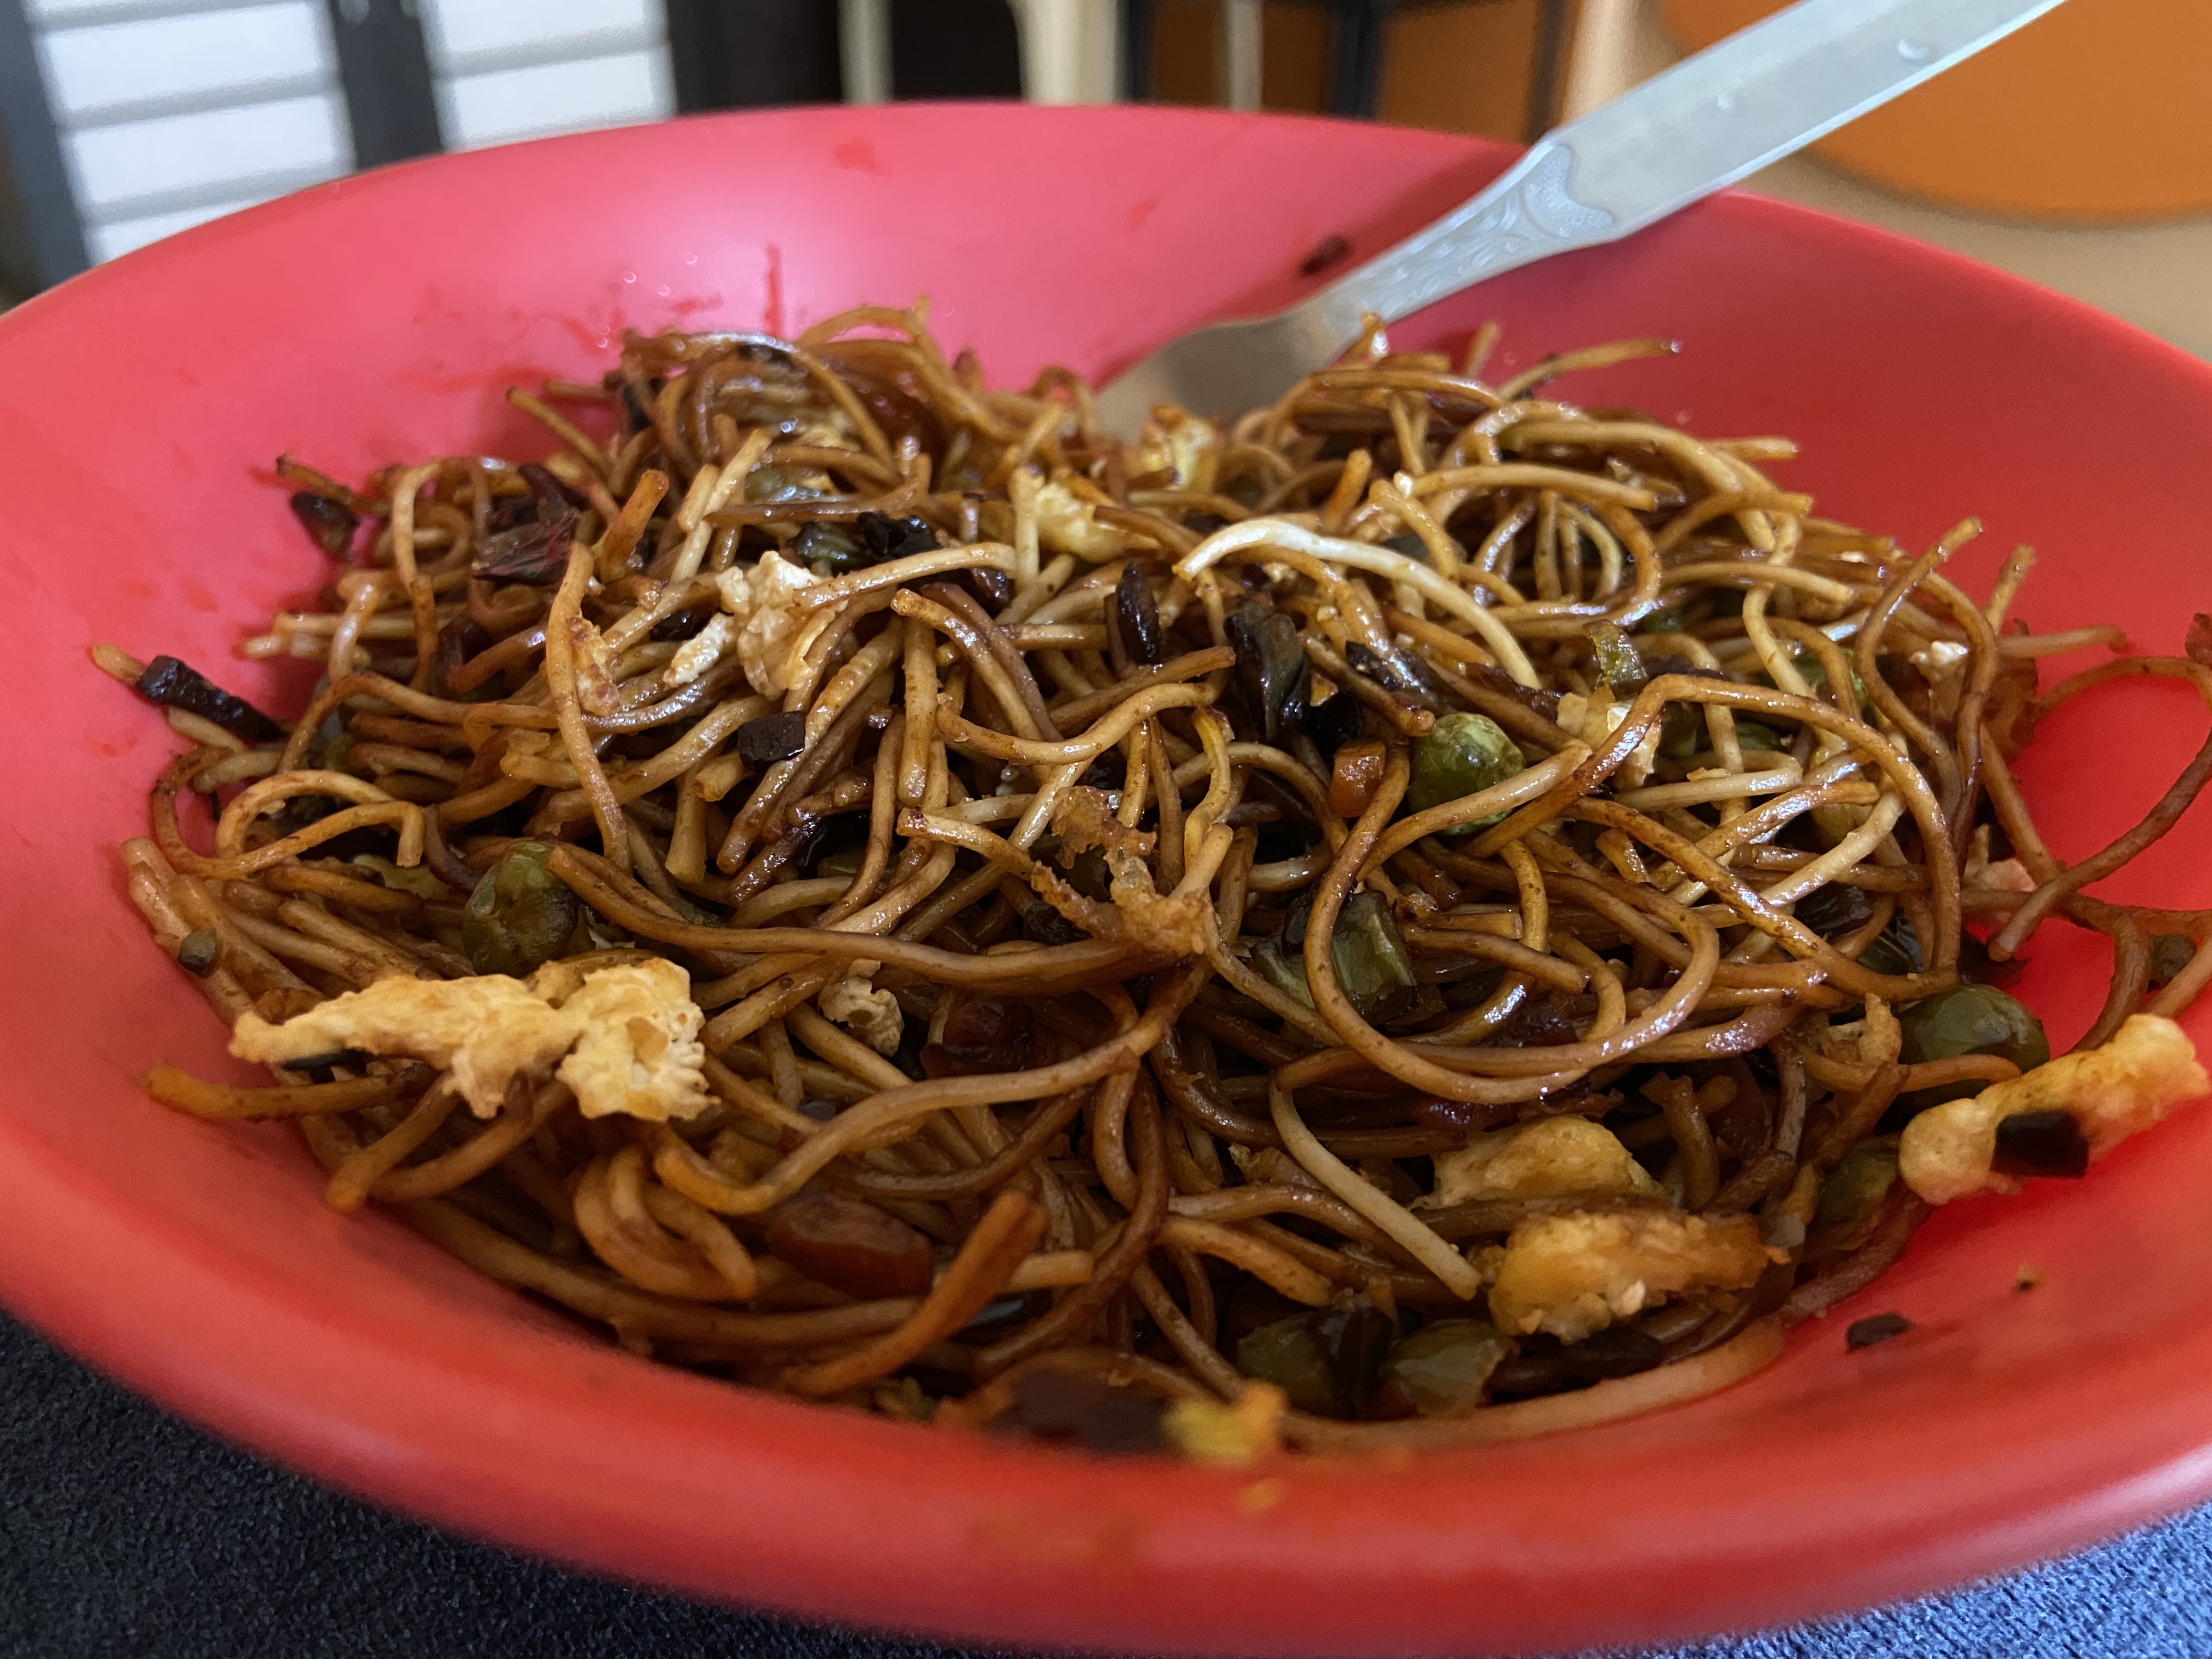
Noodles are a Chinese staple food. Just like the French are with their bread, so are the Chinese with their noodles. With their spicy food and exotic dishes, the noodles present a perfect antidote to sop off the excesses.
It’s Oriental Part 2
As with my last dish, this one is also an Indianized version of the dish. The Chinese version consists of lightly tossed stringy noodles with few chunks of meat thrown in and maybe some spring onions. The dish I am about to recite here consists of a lot more ingredients and can be eaten on its own as a snack.
Ingredients:
Hakka Noodles packet – 150gm.
Onion – 1, small
Capsicum – ½, small
Garlic – 2 cloves
Carrot – ½ carrot, medium
Beans – 15-20gms.
Peas (optional) – 1/3 cup
Vinegar – 1 tbsp.
Soya sauce – 1.5 tsp.
Chilli sauce – 1 tsp.
Ketchup – 2 tbsp.
Salt – to taste
Oil – 1.5 tbsp.
Egg / chicken (optional)
Method:
Boil the noodles in a pan with a pinch of salt till they are al-dente (90% cooked).
Chop all the veggies.
Boil the carrots, beans, peas in a separate bowl with a pinch of salt.
Drain the noodles in a colander and drizzle a little oil to keep them from sticking into a lump.
In a frying pan, heat oil. Add chopped garlic and fry till fragrant.
Add the chopped onion and capsicum and fry till golden brown.
Add the boiled vegetables and lightly fry them.
Add vinegar and the sauces and salt. Mix well.
Now add the boiled noodles and mix well till they are coated well and good with the sauce and the veggies get distributed evenly.
Fry for a while longer to get a light crunchy effect.
Optional: Scramble eggs in a separate pan and add to the noodles. OR, boil some chicken, shred it and lightly fry in a pan and to the noodles.
These different ingredients all come together to form a simple but yummy dish to load up on.
This post was written for Blogchatter A2Z challenge; Day 14 – Letter “N”.
Manchuria is a region in China. Chinese food is one of my favorite cuisines. In my family, whenever there is a small celebration or an outing, one of our favorite food combos are Hakka Chowmein and Chilli Chicken – be it home cooked or ordered from our favorite joints. This combo, I have come to notice, is not restricted to just my family; a lot of my acquaintances feel the same way about Chinese food from which I gather it is an international favorite.
It’s Oriental!
I was in China – Shanghai and Beijing – for a week during which time I tried my hand at various authentic Chinese dishes barring weird stuff. Just like India, different regions of China have different ways of preparing a same dish; again each region has some specialty. For example, the south of China favors use of red chilies (Sichuan pepper) and hence most of their dishes are red hot! I tried one and couldn’t go beyond a few mouthfuls – my tongue was on fire. There are a few staples one of which I loved – string beans! Fried string beans with pieces of meat are a yummy dish!
However, what we know as Chinese food in India differs wildly from actual Chinese food. While I loved the dishes I tried in China, I much prefer our desi Chinese. The dish I am about to mention is one such.
Ingredients:
Chicken – 500 gms., minced
Giger garlic paste – 2 tbsp.
Red Chilli Sauce – 2 tsp.
Soya Sauce – 2 tsp.
Vinegar – 1 tsp.
Egg white – 1
Cornflour – 1.5 tsp.
Salt – to taste
Oil – for deep frying
For gravy
Onions – 2 medium, chopped
Garlic – 2-3 cloves, chopped
Capsicum – ½ medium, chopped
Vinegar – 2 tsp.
Soya Sauce – 1 tbsp.
Ketchup – 2 tbsp.
Salt – to taste
Oil – 1 tbsp
Spring Onions – handful, chopped
Method:
Mix the chicken mince with ginger garlic paste, red chilli and soya sauces, vinegar and salt and mix well. Keep aside for 30 minutes.
Add the egg white and cornflour to the mince, mix properly.
Heat oil in a deep pan. Make balls from the mince and deep fry till golden brown.
Remove from oil and drain on absorbent paper. Set aside.
The balls will need to be done in batches and take time; meanwhile lets prepare the gravy.
Heat oil in a frying pan.
Add chopped garlic and fry for a minute until fragrant.
Now add chopped onion and capsicum and fry till translucent.
Add vinegar, soya sauce, ketchup and salt. Mix well.
When the gravy starts to bubble, add the fried balls and mix well. You may add a bit of water just so that there’s enough gravy to coat the balls.
Mix for a few minutes, adjust taste and take off the heat.
Garnish with spring onions.
Tip: This recipe can be used to make Veg. Manchurian as well. Instead of chicken mince, use a mix of chopped vegetables for the balls and do not use the egg, instead add more flour as a binder.
It is a little time consuming but gives such a satisfying end result – melt in the mouth chicken balls coated in delicious gravy!
This post was written for Blogchatter A2Z challenge; Day 13 – Letter “M”.
Lamb is a luxury buy in my culture; that is to say it is only prepared on special occasions and any preparation of lamb is considered to be a delicacy.
The Indian Kitchen
We i.e. bengalis call it “mangsho” reverently. Elsewhere, its called “Gosht”. Whatever moniker it may don, there is no denying its fanciness. While different regions of India have their own ways of preparing their dish – some like it sweet, some hot, some spicy while some like it simple and mild. This one is just a basic version which is nevertheless the perfect marriage with a sweet yellow Pulao.
Ingredients:
Lamb / Mutton – 500gms. (medium pieces)
Potatoes (optional) – 2, small
Onions – 3, medium
Tomato – 2, medium
Ginger Garlic paste – 4 tbsp.
Turmeric – 2 tsp.
Red Chilli Powder – 2 tsp.
Garam Masala – 2 tsp.
Salt – to taste
Sugar – 1.5 tbsp.
Green chili (optional) – 2, chopped
Oil – 3 tbsp.
Water – 1 cup
Method:
Marinade the mutton pieces with 2 tbsp. ginger garlic paste, 1 tsp. turmeric powder and salt for about 10-15 minutes.
Slice the onions thinly and dice (medium) the potatoes. Cut up the tomatoes roughly and blend to a puree.
In a pressure cooker, heat the oil.
Add the sliced onions and fry until they are lightly golden brown.
Add the tomato paste, remaining ginger garlic paste, chopped green chilli, remaining turmeric powder and red chilli powder.
Cook until oil starts to release from the sides. Now add the mutton pieces and salt.
Cook on medium flame, stirring regularly and mixing the masala well with the meat. Water will now be released from the meat.
Once all the released water has dried up, lower the flame and cook for another 2-3 minutes.
Now add potatoes, water, sugar and garam masala and cover and cook on pressure.
Let it cook for 6-7 whistles on medium flame.
Serve hot with rice or pulao!
This is a dish which will give you warm, fuzzy feelings and leave you replete and happy. Try it out and let me know how it turns out.
This post was written for Blogchatter A2Z challenge; Day 12 – Letter “L”.
Kababs are chunks of spiced meat skewered on a stick and generally cooked over open flame. There are various versions – some are just meat cubes while some are minced meat made into sausages, yet others are stuffed. They are juicy but with no gravy/coating and usually served with accompanying dips or chutneys. They are part of the first course/starters.
From the Land of Sheikhs
Kababs are without doubt a middle eastern fare. It originates from the Arab regions for whom they are an everyday delicacy. From there, the dish crept into the cuisine of North India and we have happily adopted and adapted it as one of our own. The recipe below is my own, a further adaptation or variation of the infamous kabab.
Ingredients:
Chicken – 200 gms., boneless
Curd – 2 tbsp.
Ginger garlic paste – 2 tsp.
Red chilli powder – 2 tsp.
Turmeric powder – 1 tsp.
Garam masala – 1 tsp.
Coriander powder – 1.5 tsp.
Cumin powder – 1.5 tsp.
Salt – to taste
Oil – as required
Method:
Cut the boneless chicken into cubes. Pierce with a fork. This helps for the marinade to seep into the meat well.
Add the curd, ginger garlic paste and all the dry spices. Mix well. Set aside to marinade for atleast 2 hours.
Cooking on Gas burner: Grease the wooden sticks to be used as skewers with oil. Now, skewere the marinaded chicken pieces onto the sticks. Brush oil over the chicken.
Now, set the loaded sticks on a lightly oiled frying pan. Cover the pan and cook for about 20 minutes. Occasionally rotate the sticks so that all sides are cooked equally.
Cooking in an OTG: Grease the rotisserie stick with oil and load the marinaded chicken pieces onto the stick.
Now, set the option to rotisserie on the OTG and cook at 180°C for 20-25 minutes or until cooked.
Serve hot with coriander chutney, onion slices and garnished with chaat masala.
Tip: You can add fresh cream or coriander leave paste or malai or cheese to the marinade for varied flavored kababs. Onion and/or capsicum chunks can be added alternately with the chicken pieces. Adds a different dimension to the taste.
This is a great party dish which can be served up as a starter and will be enjoyed by one and all, guaranteed!
This post was written for Blogchatter A2Z challenge; Day 11 – Letter “K”.
Jhol is a Bengali word meaning gravy. It forms the base for any vegetarian or non-vegetarian Bengali dishes. It may be a watery gravy which is generally preferred to be consumed with rice or it may be a dry and thick gravy which is generally suitable to be had with roti (flat bread). The thicker version is generally spicier and hence meant for special occasions or holidays while the watery version is lighter and meant more everyday consumption.
Bengal Connection
This is something that I have grown up with; this was home food – comforting yet tasty. Nothing too onerous, simple everyday ingredients cooked with love.
Maccher Jhol or Fish Curry
Ingredients:
Kala jeera – 1 tsp.
Green Chilli – 2, slit
Tomato – 1 small, paste
Turmeric / haldi powder – 1 tsp.
Cumin / Jeera powder – 1 tsp.
Coriander / dhaniya leaves – fistful, chopped
Salt – to taste
Oil – 3 tbsps.
Water – 1 cup
Fish – 2-4 pieces
Method:
Marinade the fish pieces with salt and ½ tsp. turmeric, for 10-15 minutes.
Fry the pieces in the oil – medium high flame – till both sides are lightly golden brown. Keep aside.
In the remaining oil, add the kala jeera and green chilli. Lower the flame.
Once the tempering starts to splutter, add the tomato paste, remaining turmeric powder, cumin powder, coriander leaves and salt.
Once the masala has fried, add water and add the fried fish pieces.
Once the water has started to boil, adjust the taste and switch off the heat.
Maccher jhol is ready.
Kosha Murgi or Chicken Curry
Ingredients:
Chicken – 500gms.
Potato – 2, large
Onion – 2, medium
Tomato – 2, medium
Ginger Garlic paste – 1 tbsp.
Turmeric powder – 1 tsp.
Kashmiri red chilli powder – 2 tsp.
Salt – to taste
Sugar – to taste
Oil – 3-4 tbsp.
Garam masala – 2 tsp.
Method:
Chop the onion and tomato into rough pieces. Grind to a paste. Cut the potatoes into quarters.
Heat oil in a pan. Add the onion-tomato paste. Let it fry for a few minutes.
Add the ginger garlic paste, turmeric powder, red chilli powder and salt and fry for a few more minutes until the oil starts to release from the sides.
Now add the chicken and the potatoes and mix well on medium flame.
Once properly fried and mixed, lower the flame, add sugar and stir.
Cover and cook for 15-20 minutes until the released water is dried up.
Adjust salt and sugar as per taste, if required. Add garam masala, give it a stir and switch off flame.
Chicken curry is ready!
Alu Fulkopir Jhol or Cauliflower-Potato Curry
Ingredients:
Cumin / jeera whole – 1 tsp.
Tomato – 1 medium, chopped
Turmeric / haldi powder – 1 tsp.
Cumin / Jeera powder – 1 tsp.
Ginger – 1” piece, grated
Green Chilli – 2, broken into half
Salt – to taste
Oil – 3 tbsps.
Water – 1/2 cup
Cauliflower – 1 medium
Potato – 1 medium
Method:
Cut the cauliflower and potato into 1” florets and cubes respectively.
Heat oil in a pan. Add whole cumin.
When it splutters, add the chopped tomato, turmeric, cumin powder, grated ginger, green chilli and salt. Let it fry for 2-3 minutes.
Add the cauliflower and potato and mix well. Cook on medium flame for 7-8 minutes.
Then lower flame, add water, cover and cook until both vegetables are tender.
Gravy is generally a little watery.
Deem er Kosha or Egg Curry
Ingredients:
Eggs – 4
Potato – 1, large
Onion – 1, medium
Tomato – 1, medium
Ginger Garlic paste – 1 tbsp.
Turmeric powder – 1 tsp.
Kashmiri red chilli powder – 2 tsp.
Salt – to taste
Sugar – to taste
Oil – 3-4 tbsp.
Water – ¼ cup
Garam masala – 2 tsp.
Method:
Chop the onion and tomato into rough pieces. Grind to a paste. Cut the potatoes into quarters.
Boil the eggs and the potatoes.
Heat oil in a pan. Fry the eggs and the potatoes. Make superficial slices with a knife on the boiled eggs. This helps to keep the eggs from spluttering/exploding.
In the remaining oil, add the onion-tomato paste. Let it fry for a few minutes.
Add the ginger garlic paste, turmeric powder, red chilli powder and salt and fry for a few more minutes until the oil starts to release from the sides.
Add water, eggs and potatoes and mix well on medium flame.
Once properly fried and mixed, lower the flame, add sugar and stir.
Cover and cook for 5 more minutes until the water has dried up to a thick gravy sticking to the eggs and potatoes.
Adjust salt and sugar as per taste, if required. Add garam masala, give it a stir and switch off flame.
Have this with luchi or puri, this is a perfect marriage!
Egg Curry steps…
Tip: Kosha is ideally thick dry gravy, but you may keep a little fluid as per your tastes.
These general gravy may be used for other vegetables or meat and enjoy with rice or bread/roti. The jhol will give you a warm, homely feel but will make your taste buds dance.
This post was written for Blogchatter A2Z challenge; Day 10 – Letter “J”.
The perfect end to every meal – a dessert. And what’s the perfect dessert? Ice cream of course! Age no bar, country no bar – ice cream is by far everyone’s favorite dessert, mine included. The cold, sweet, creamy yumminess has no equal. To add to the delight, it comes in various flavours – something for everyone’s tastes.
Ice cream is literally (and originally) the iced version of cream. However, it can be made from milk as well. It comes in various forms nowadays – sorbet, gelato, froyo, softy, etc. (I’m drooling as I’m writing!)
The Homemade Way
This recipe is straight from our kitchen – the easy way with no requirements for ice cream churners or machines or huge quantities of ice. The method is actually closer to a kulfi which is a traditional Indian ice cream. Whichever, it tastes delectable.
Ingredients:
Milk – 500 ml.
Sugar – 4 tbsp.
Custard Powder (vanilla) – 40g.
Method:
Mix the custard powder in 3/4 cup of milk (~150ml). Stir well till there are no lumps and it is a smooth mixture.
Boil the remaining milk (~350ml) till it has reduced to about 2/3 of its volume.
Add the sugar and boil for a further 10 minutes. Keep stirring or the milk will burn / stick to the bottom.
Now slowly add the custard mixture, stirring all the while. Boil for a few more minutes until the custard has started to thicken and turn off the heat.
Cool the mixture. It should be of a consistency slightly runnier than a gloopy custard.
Once cooled, pour into your designated ice cream bowl or moulds and freeze.
Half a day of freezing later, your home-made ice cream is ready!
You may add melted chocolate or strawberry or any flavour of your choice to turn this into a flavored ice cream rather than just plain vanilla. Personally, this method gives a sort of kesar type flavour and feel which I adore.
This post was written for Blogchatter A2Z challenge; Day 9 – Letter “I”.
This is a dish I have come across very recently owing to a special set of circumstances. I needed to eat healthy for a while but as you know or rather, I believed, anything healthy can’t be really tasty and anything too tasty is never good for your health. Or, is it? Well, this dish certainly proved me wrong. This stew has it all – vegetables, pulses, protein, and taste.
Mom’s Kitchen
This is straight from Mom’s kitchen. When in doubt (unlike Hermione who goes to the library), I ask Ma (my mom). She gave me this recipe which is super easy but is healthy, hearty and tasted good with very little spices.
Without further ado, here’s the recipe for chicken stew.
Ingredients:
Chicken – 100gms.
Beans – 50gms.
Peas – 1/2 cup
Cabbage – 75gms. (a chunk)
Masoor or yellow moong daal – 1 tbsp.
Ginger – 1” piece
Garlic – 1-2 cloves
Onion – 1 medium
Tomato – 1 small
Salt – to taste
Pepper – 1 tsp.
Butter – 1 tsp.
Method:
Cut the chicken into cubes and chop up all the vegetables.
Put the chicken, vegetables, and the daal in a pressure cooker. Add salt and 1 cup water.
Cook for 1 whistle on high and 1 whistle on low.
Once pressure is released, open up the cooker and give it a stir to mix it. Ladle into a bowl.
Sprinkle pepper and add butter to the hot stew. Serve hot.
The Ingredients
This will be enough for 2 people for one meal. It’s an enriching dish which will fill your stomach and leave you with a warm, fulfilled glow. Have it on a rainy day or just a day when you feel like eating light and healthy.
This post was written for Blogchatter A2Z challenge; Day 8 – Letter “H”.